
Jumbo S’mores Cups (Bakery‑Style)
As an Amazon Associate, I earn from qualifying purchases. Read the full disclosure here.
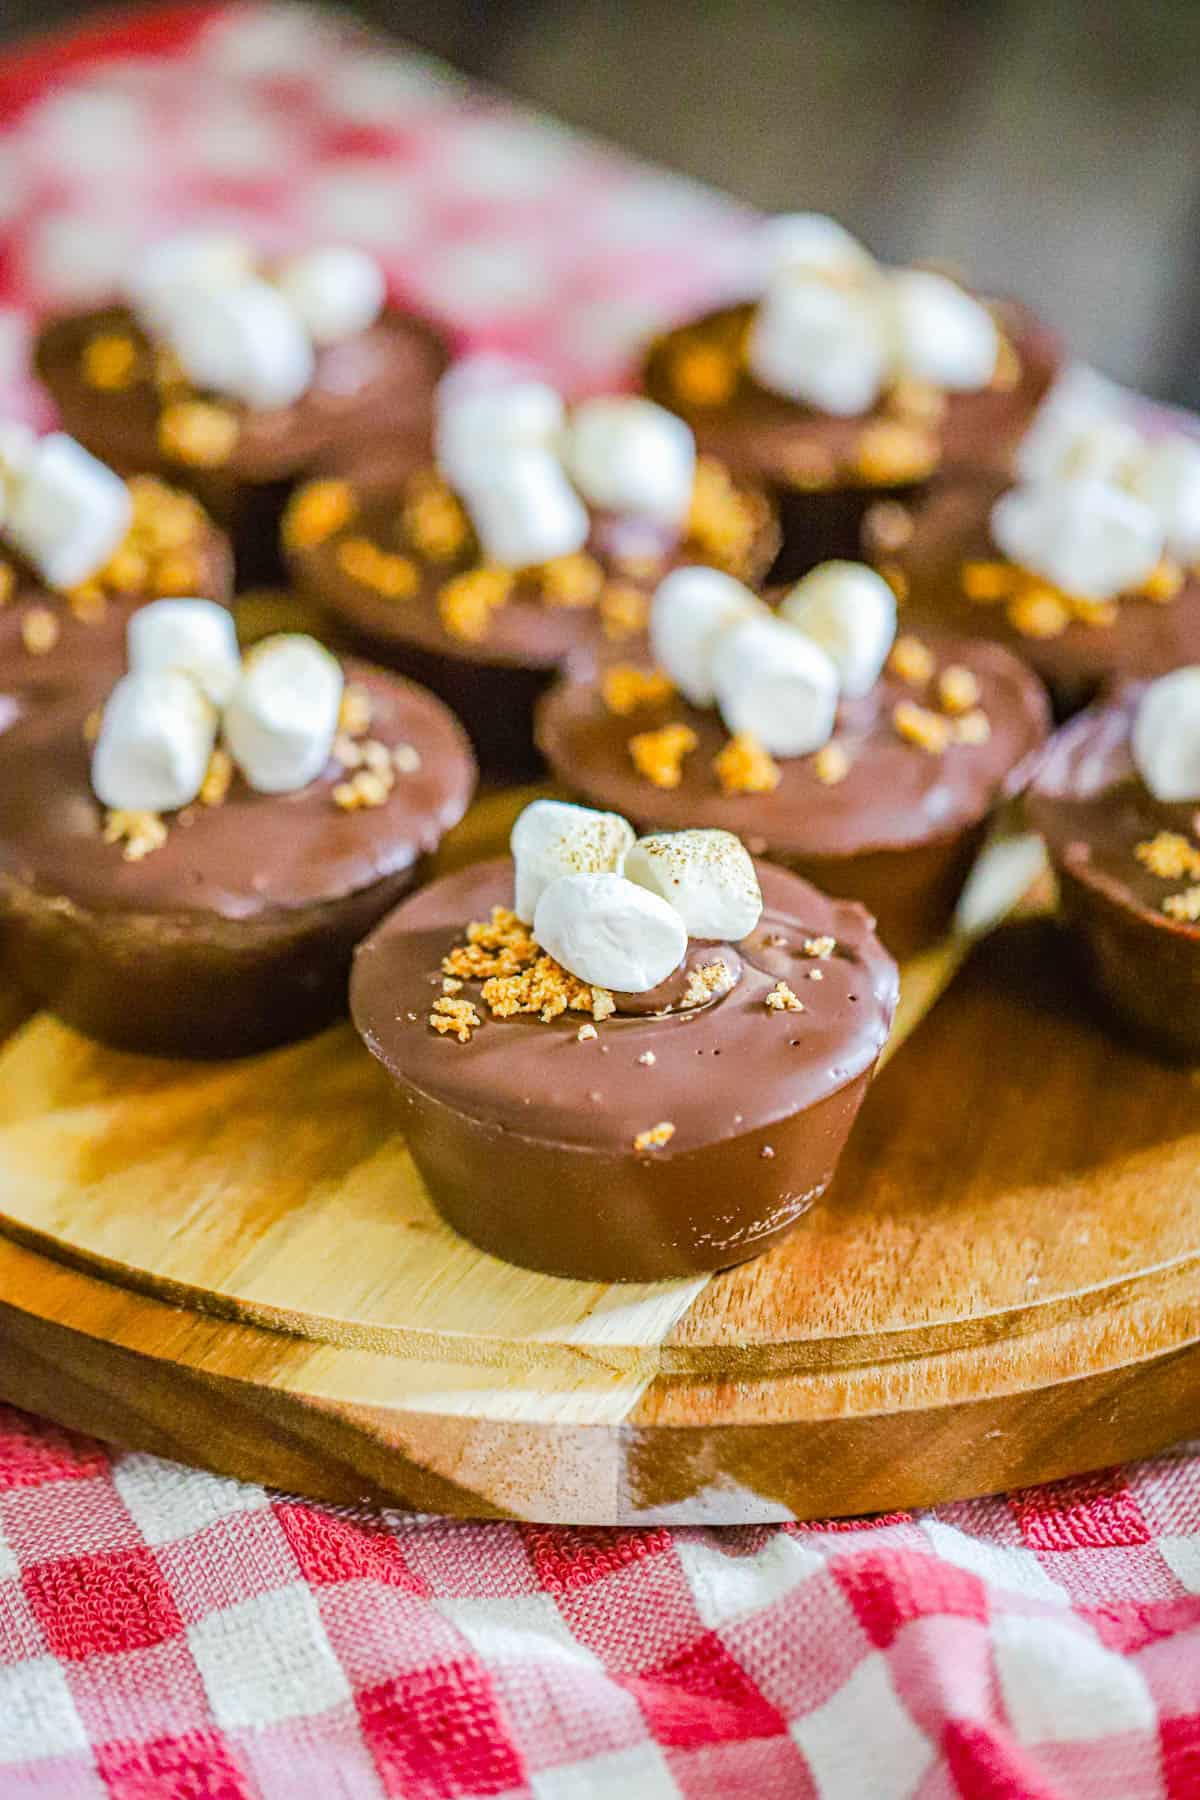
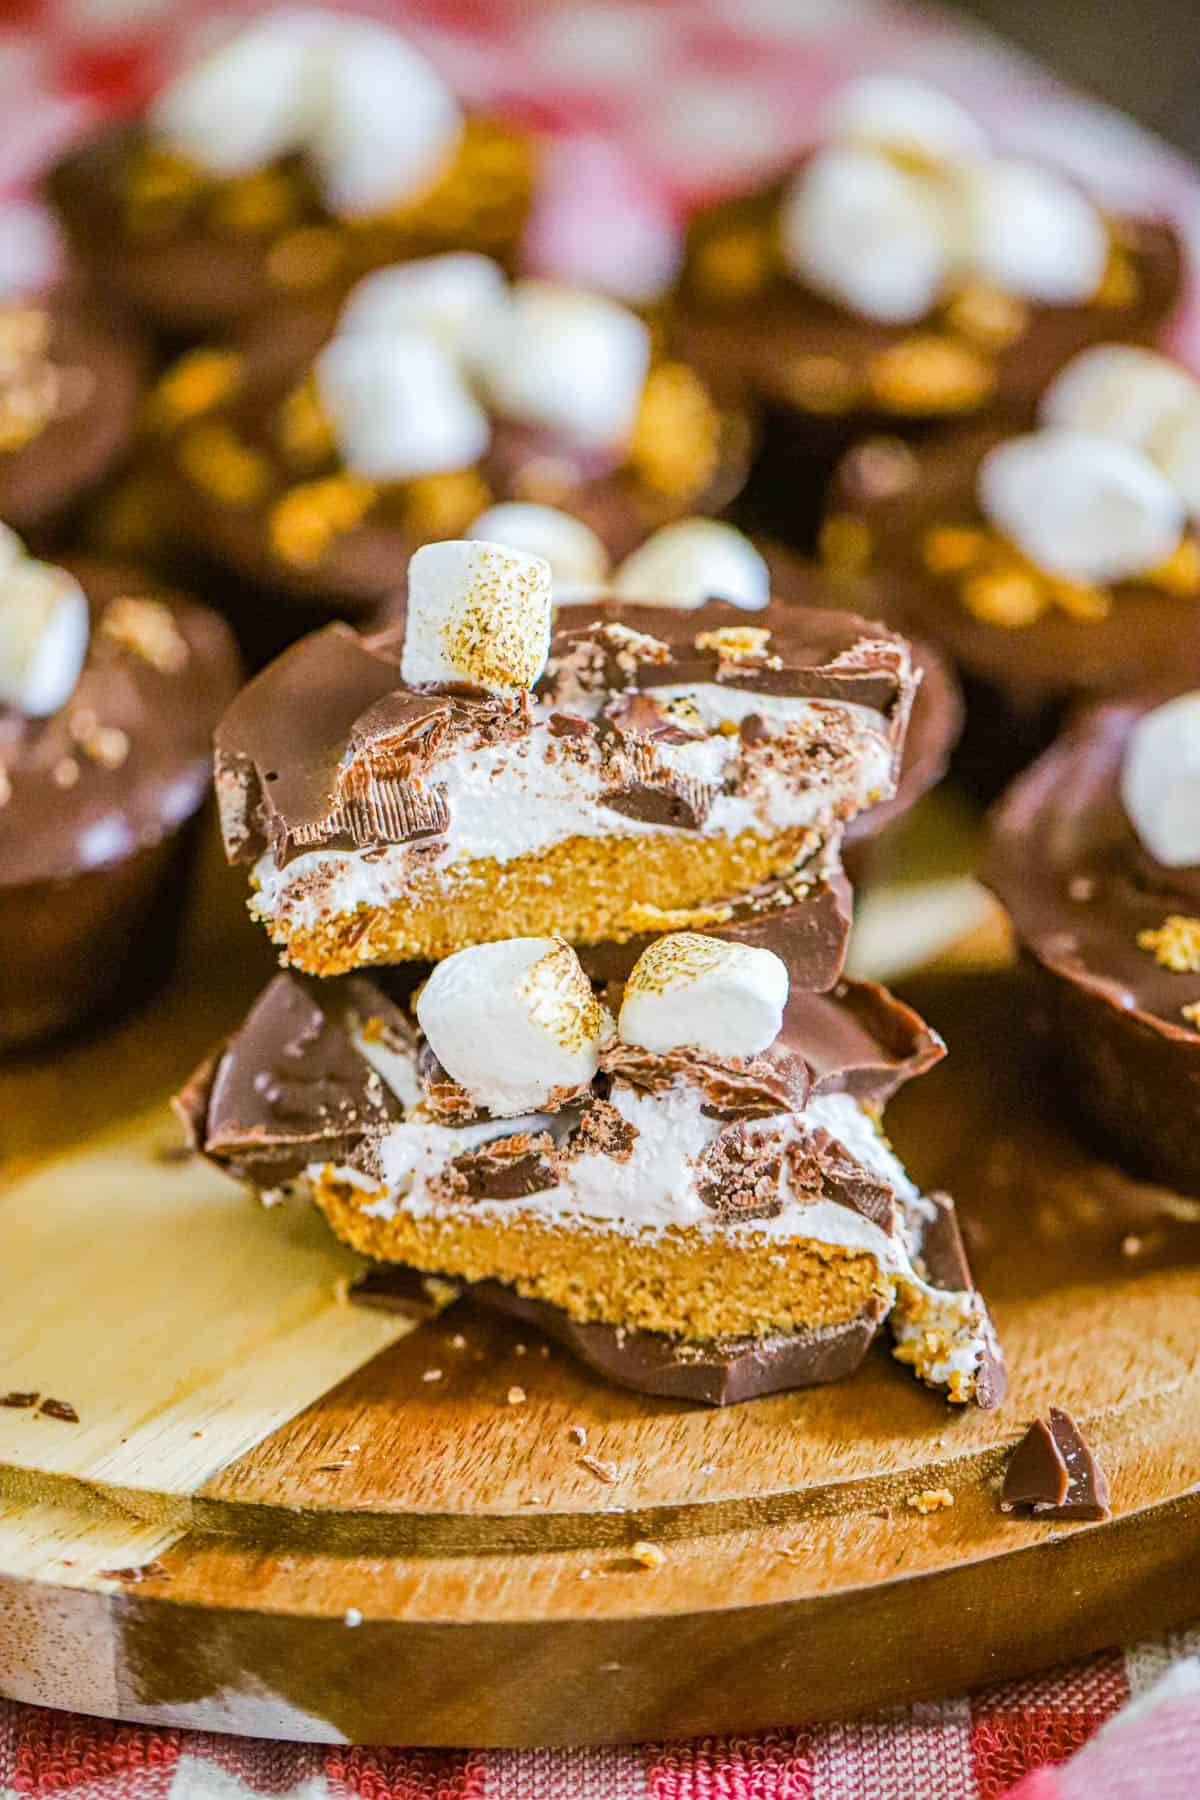
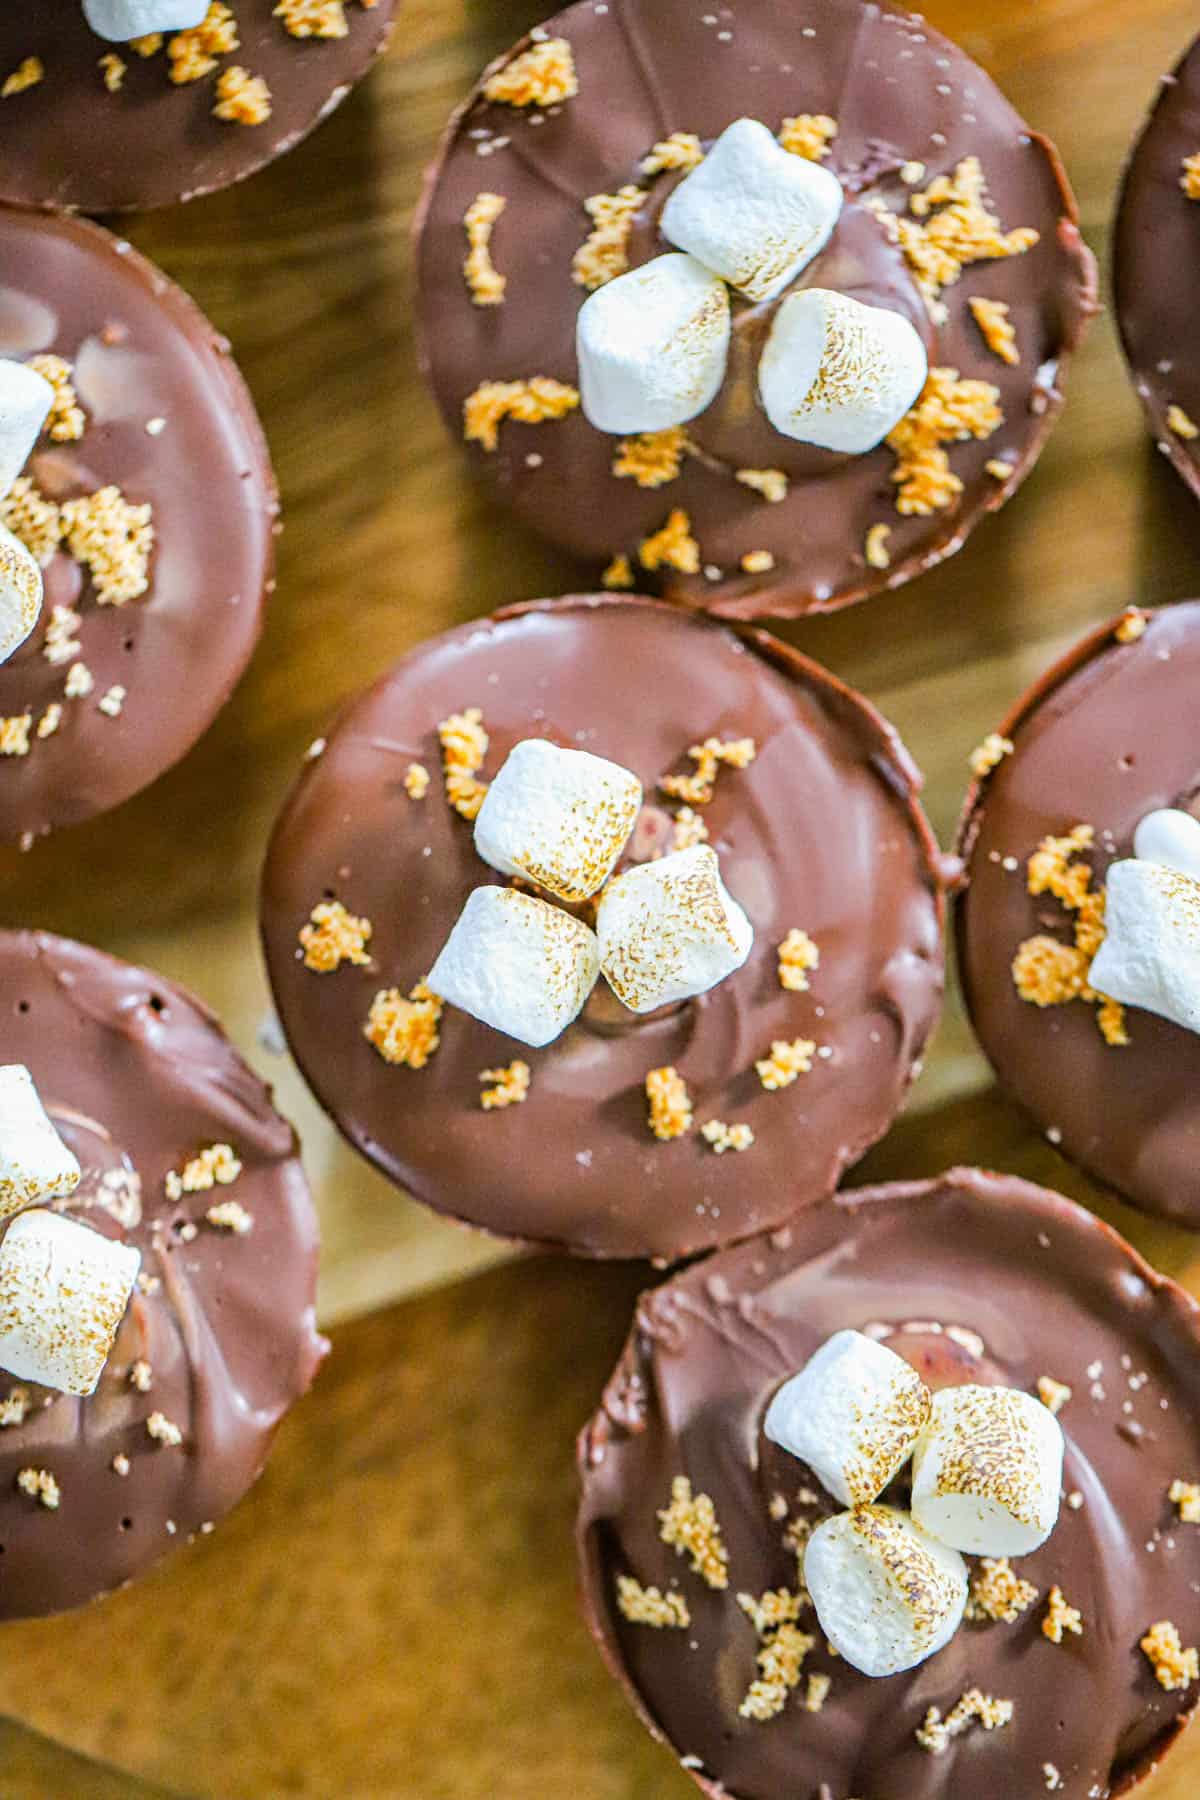
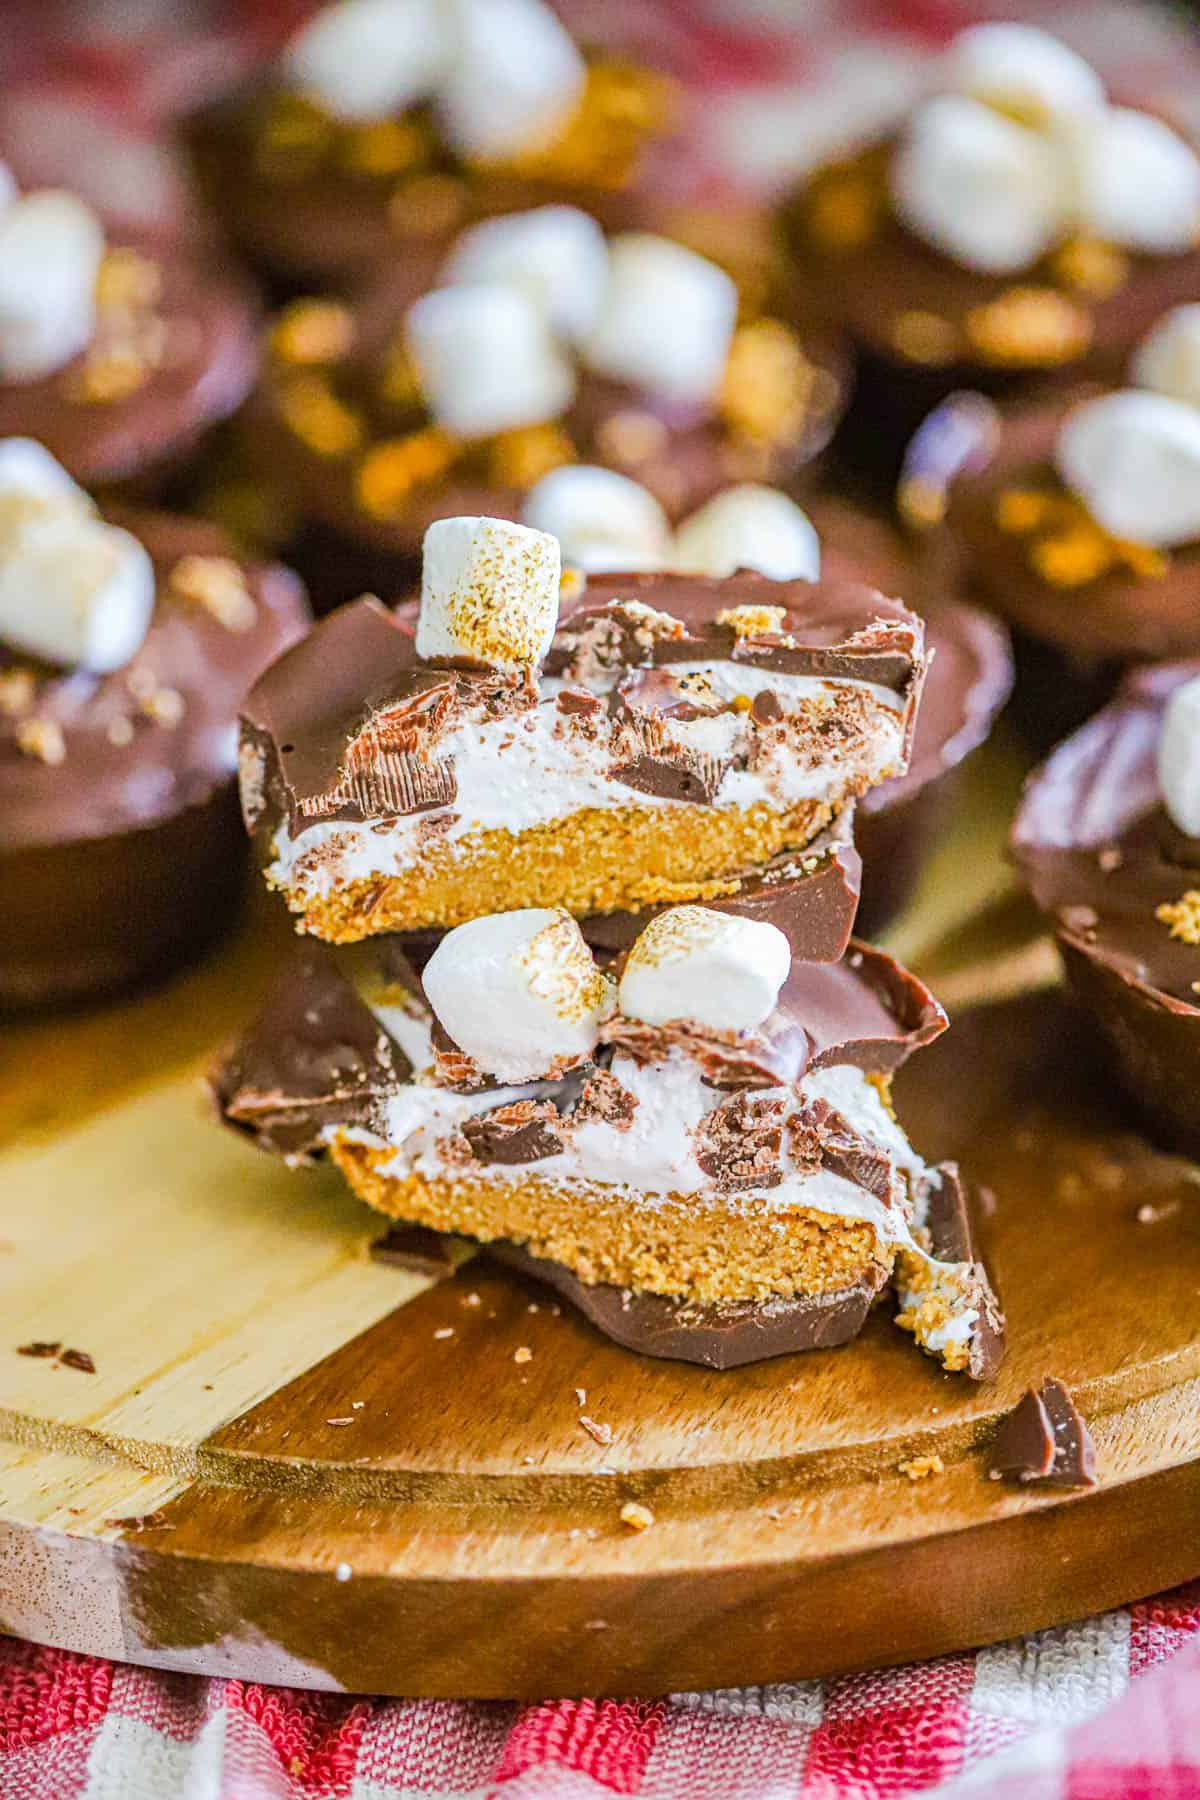
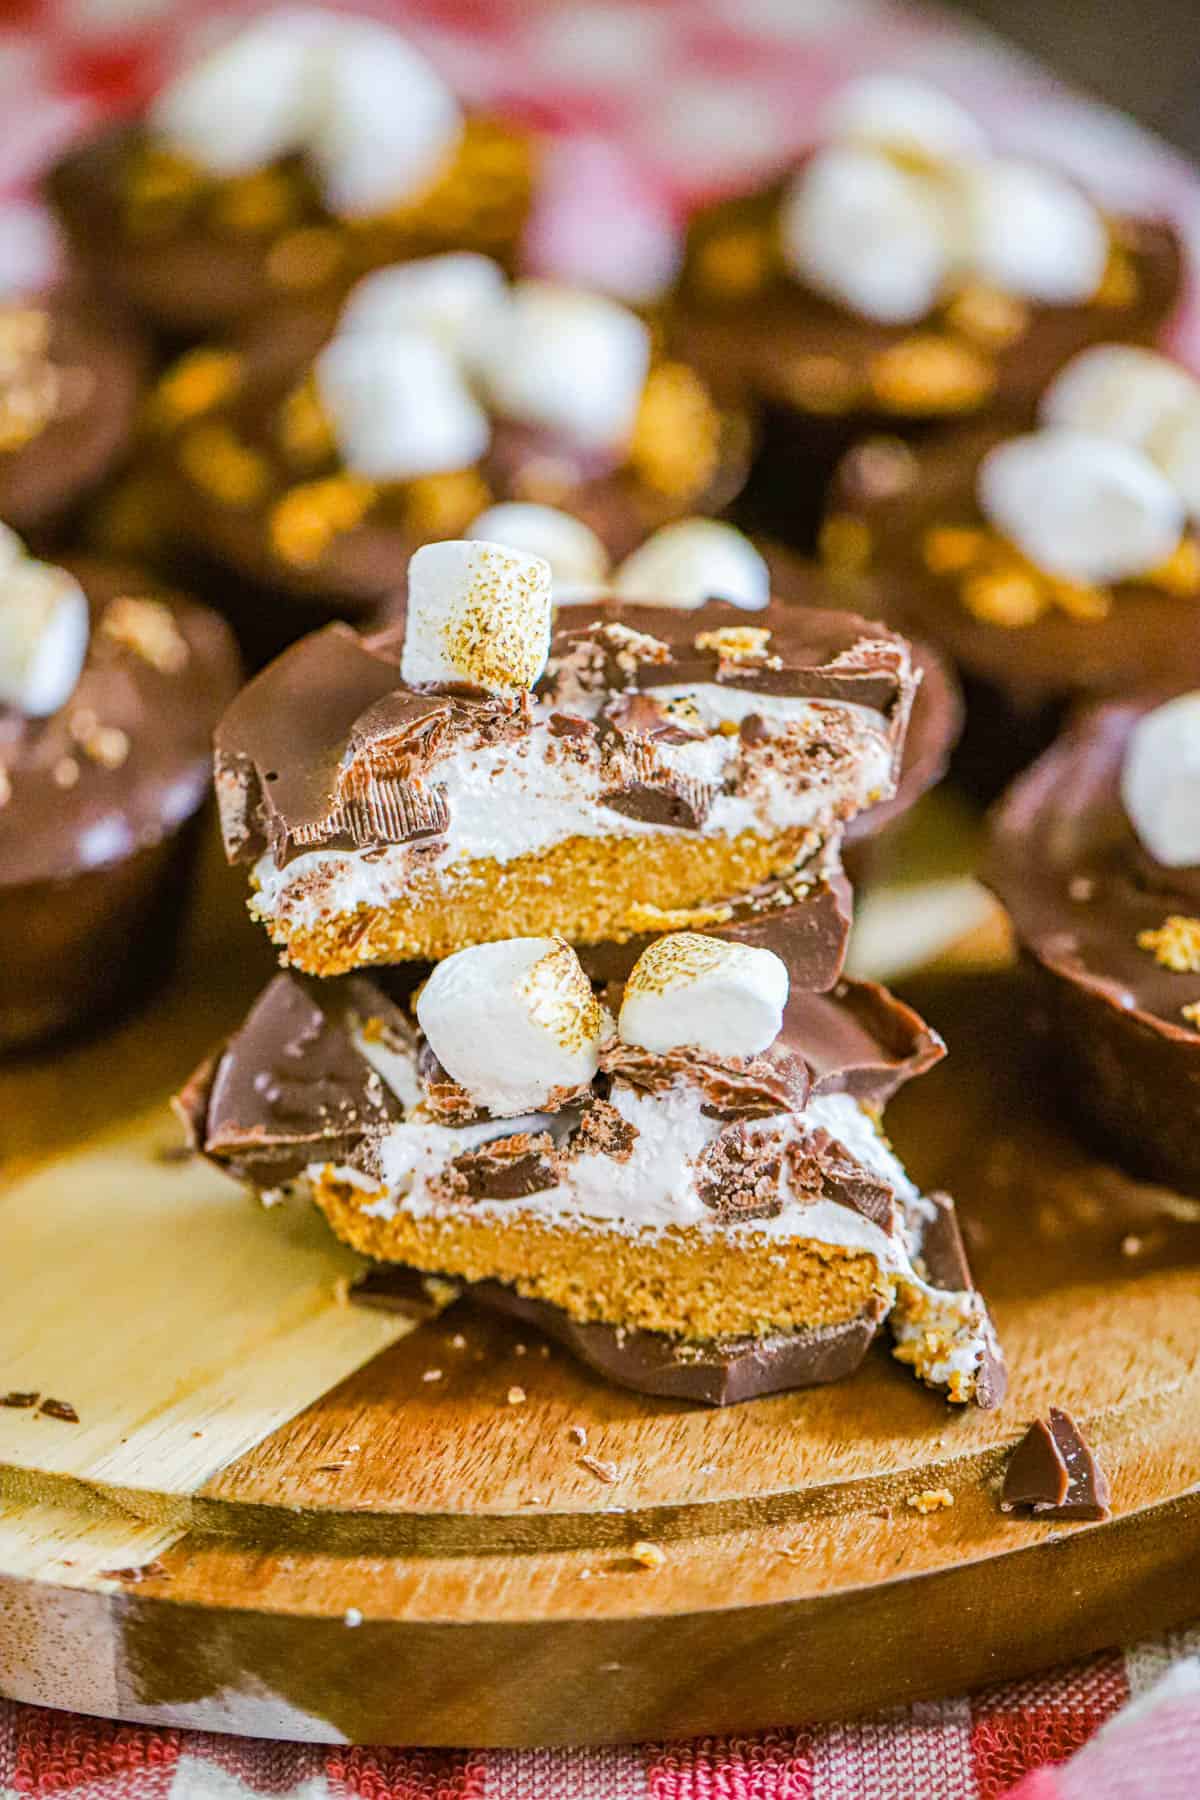
These bakery-style Jumbo S’mores Cups are thick chocolate cups filled with a peanut butter graham cracker crust and fluffy marshmallow creme. These no bake s’mores cups have a generous, gooey middle, a firm chocolate coating, and a little graham cracker crunch on top.
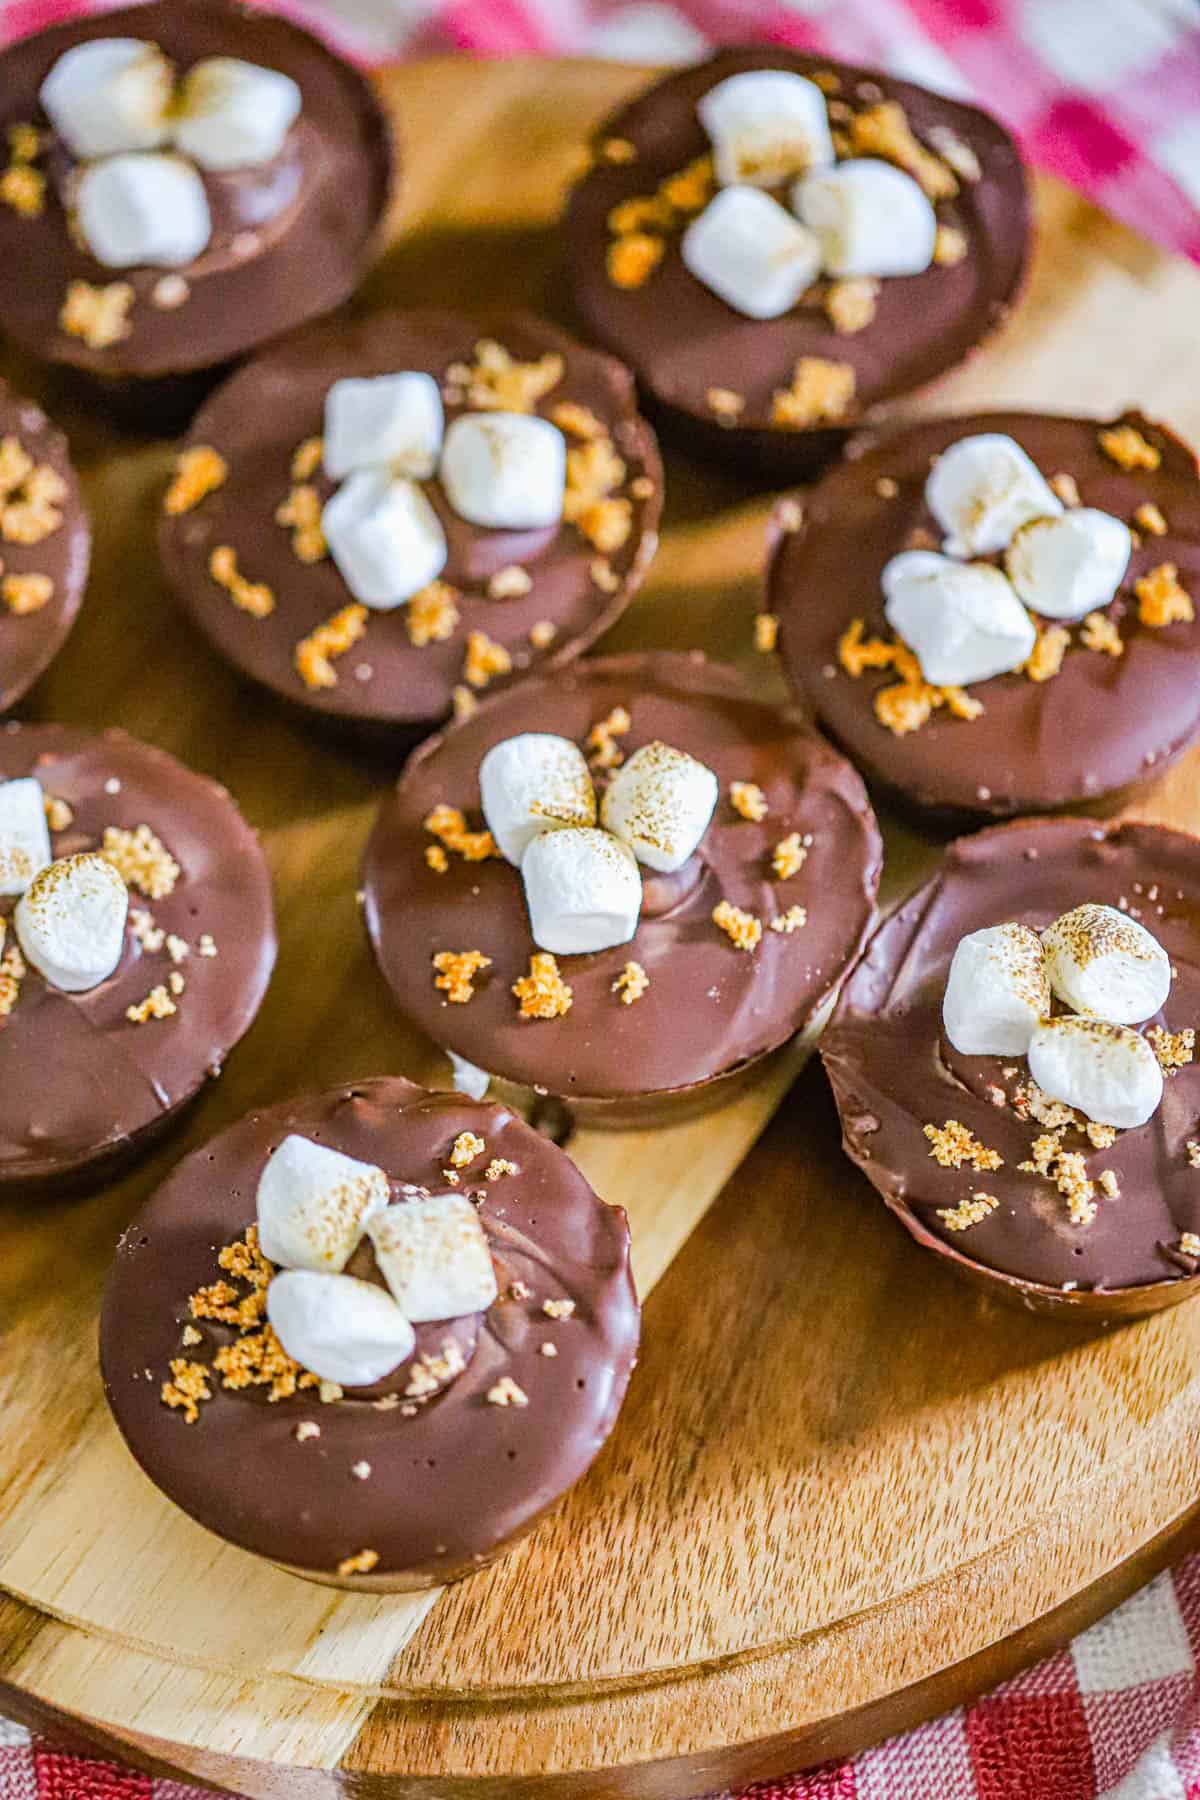
Add toasted mini marshmallows for that campfire finish, then slice one in half to share or serve all six on a holiday dessert tray!
Why You’ll Love These Jumbo S’mores Cups
- Every cup has a thick peanut butter graham layer, so you get that salty, nutty flavor alongside the sweet marshmallow.
- Then comes the chocolate coating! Keep it thin enough to bite through while still covering all that fluffy filling.
- The recipe makes six generous cups, although you can divide the same ingredients among nine wells for smaller portions.
- Plus, you can prepare them ahead and keep them chilled until it’s time to fill a candy tray or gift box.
For another chocolate cup with a gooey center, try these Turtle Caramel Brownie Cups. The caramel and pecans make a delicious partner for a holiday candy assortment.
Ingredients for No Bake S’mores Cups
For these peanut butter s’mores cups, you’ll need graham cracker crumbs, creamy peanut butter, butter, marshmallow creme, and chocolate for six jumbo cups. Choose a thick, creamy peanut butter rather than a very runny variety. Also, measure the crumbs after crushing them; cracker sizes vary, so a sheet count can leave you short.
Graham Peanut Butter Crust
- 1 1/2 cups fine graham cracker crumbs
- 1/2 cup creamy peanut butter
- 3 tablespoons unsalted butter, melted
- Pinch of salt
Marshmallow Filling and Chocolate Coating
- 7 ounces marshmallow creme
- 1 1/2 cups chocolate chips or chocolate melting wafers
- Up to 1 tablespoon coconut oil, optional, only if needed to thin the chocolate
- 1 tablespoon extra graham cracker crumbs, optional topping
- 18 mini marshmallows, optional topping
Milk chocolate gives these the sweetest candy-shop flavor, while semisweet chocolate adds a deeper chocolate bite. Melting wafers are a convenient choice for a molded coating. However, follow the package directions before adding oil; many wafers melt smoothly without any.
How to Make Jumbo S’mores Cups
Coat the molds first, then add the graham and marshmallow layers before sealing with chocolate. Use six jumbo silicone muffin wells, each holding at least 3/4 cup, and set the flexible pan on a baking sheet. A regular muffin well is smaller, even when the pan has 12 wells.
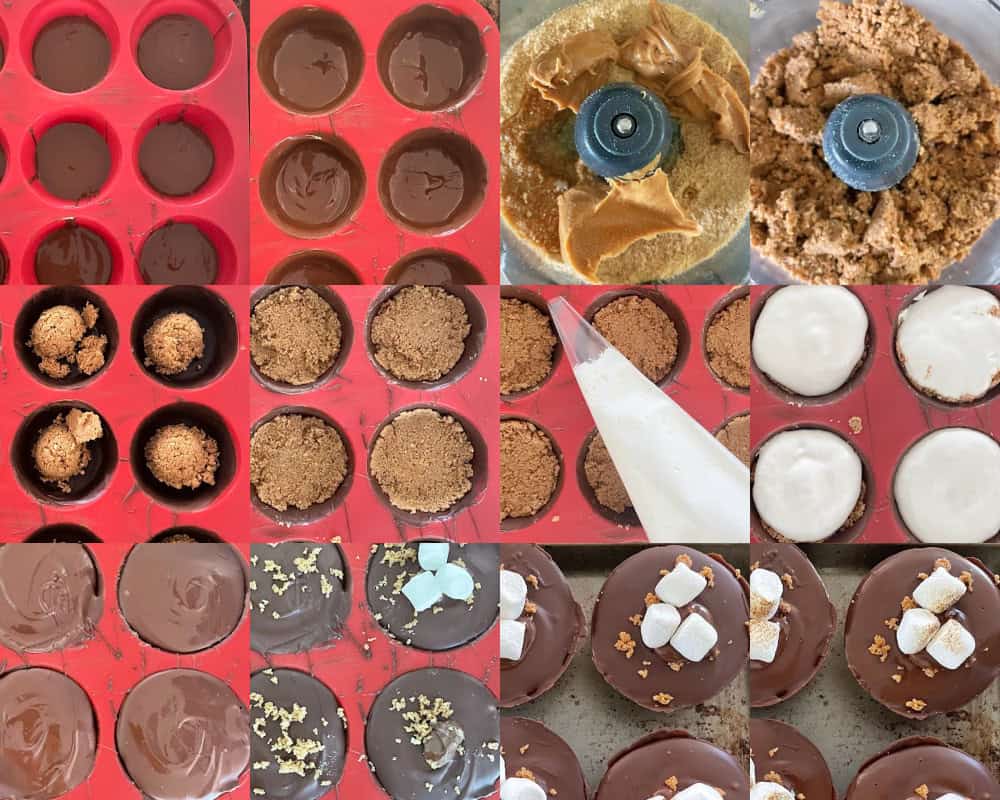
- Melt 1 1/2 cups chocolate chips or wafers in a dry bowl in 20 to 30-second microwave bursts, stirring after each. If needed, stir in coconut oil a teaspoon at a time, up to 1 tablespoon. Reserve about half the melted chocolate for the tops.
- Divide the other half among six jumbo silicone wells, starting with about 1 tablespoon per well. Spread it across the bottoms and up the sides to the planned filling height. Chill for 5 to 10 minutes until firm, then use the remaining coating portion to patch thin spots and chill again.
- Mix 1 1/2 cups graham crumbs, 1/2 cup peanut butter, 3 tablespoons melted butter, and a pinch of salt. Divide the mixture evenly among the six coated wells and press gently into an even layer. Refrigerate for about 10 minutes.
- Divide 7 ounces marshmallow creme evenly over the six crusts. Spoon it in or pipe it from a bag, then smooth gently, leaving space below the chocolate rim. Chill for about 10 minutes while the reserved chocolate cools to barely warm.
- Divide the reserved half of the chocolate over the six marshmallow layers, spreading it to meet the side coating. If it has thickened, rewarm it in brief bursts, then let it cool before spooning it over the filling.
- Scatter up to 1 tablespoon extra graham crumbs and 18 mini marshmallows across the six tops, if using. Refrigerate for 30 to 45 minutes, or until completely firm, before gently peeling away the silicone.
Tips for Neat Chocolate No Bake S’mores Cups
A continuous chocolate coating and a little space above the filling help seal these cups. Thin patches are easier to fix before you add the graham crust, so check the sides first!
- Keep the bowl and spoon dry. Water can turn melted chocolate thick and grainy.
- Also, avoid packing all the chocolate onto the bottoms. Save enough for the sides and lids.
- Let the chocolate cool until barely warm before covering the marshmallow. Hot chocolate makes that sticky layer harder to keep tidy.
- For toasted toppings, brown the mini marshmallows separately with a culinary torch on a heatproof surface, away from paper liners. Then let them cool and add them to the cups. Skip the torch for an untoasted finish.
How to Store Jumbo S’mores Cups
Keep the cups in an airtight container in the refrigerator for up to 1 week for best texture. Place parchment between layers so the marshmallow toppings don’t stick. Then let a cup stand for 5 to 10 minutes before serving for a softer bite.
For gifting, place chilled cups in jumbo candy liners inside a snug bakery box or food-safe tin. Also, include a keep-refrigerated note and mention the peanuts. Use a cold pack for transport in warm weather; chocolate and a hot car don’t get along!
How to Freeze No Bake S’mores Cups
Freeze the peanut butter s’mores cups for up to 2 months for best quality. First, freeze them in a single layer until firm, then wrap individually and pack in an airtight freezer container. Thaw covered in the refrigerator overnight. For the prettiest finish, add graham crumbs and toasted marshmallows after thawing, since freezing can soften those toppings.
Variations for No Bake S’mores Cups
Swap the chocolate variety or change the crumb flavor while keeping the same layered assembly. For example, cinnamon graham crackers add a warm spice note. Dark chocolate is another delicious choice when you want a less sweet coating against the marshmallow.
For a peanut butter alternative, use the same measured amount of a thick sunflower seed butter. However, check every ingredient label and preparation surface when making treats for someone with an allergy. The flavor will change, but you’ll still have a creamy graham layer beneath the marshmallow.
No Bake S’mores Cups FAQs
Can I make jumbo s’mores cups ahead?
Yes. Make them 1 to 2 days ahead and refrigerate in an airtight container. Then add freshly toasted marshmallow toppings shortly before serving for the best texture.
Can I replace the creme with mini marshmallows?
Not as a direct swap. Mini marshmallows won’t spread into the same soft, even layer, and melted marshmallows set differently. For this recipe, use 7 ounces of marshmallow creme.
Can I make these peanut butter s’mores cups in a regular muffin pan?
Yes. Use liners or silicone molds and divide the ingredients among nine regular wells, keeping the filling below the rims. However, well sizes vary, so use additional wells if needed rather than overfilling.
Why did my chocolate coating crack?
The coating may have been too thin, or the cup may have bent during removal. Next time, patch bare spots before filling, chill until firm, and peel the silicone away gently while supporting the bottom.
Bring on the Jumbo Peanut Butter S’mores Cups
Peanut butter graham crumbs, fluffy marshmallow, and a thick chocolate finish make such a tempting little stack! Slice a chilled cup into wedges for a candy board, or tuck one into a lined box for a sweet gift. Share your batch on Instagram, save it on Pinterest, and join me on Facebook.
More Chocolate and Marshmallow Treats
Keep the graham cracker crunch going with s’mores pretzel clusters, or bake these jumbo marshmallow-stuffed s’mores cookies for a warm, gooey dessert.
- Marshmallow Peanut Butter Chocolate Bliss Bars
- Holiday White Chocolate Marshmallow Fudge
- Peppermint Marshmallow Fudge
- Fluffy Chocolate Marshmallow Peanut Clusters
- Easy S’mores Clusters
Jumbo S'mores Cups
Equipment
- Jumbo silicone muffin pan with 6 wells of at least 3/4-cup capacity each
- Baking sheet to support the silicone pan
- Microwave-safe bowl
- Mixing bowl
- Spoon or small spatula
- Measuring cups and spoons
- Piping bag optional
- Culinary torch and heatproof surface optional
Ingredients
Graham Peanut Butter Crust
- 1 ½ cups fine graham cracker crumbs
- ½ cup creamy peanut butter
- 3 tablespoons unsalted butter, melted
- 1 pinch salt
Marshmallow Layer
- 7 ounces marshmallow creme
Chocolate Coating
- 1 ½ cups chocolate chips or melting wafers
- 1 tablespoon coconut oil optional, use only as needed
Optional Toppings
- 1 tablespoon graham cracker crumbs
- 18 mini marshmallows
Instructions
Chocolate Shells
- Set a 6-well jumbo silicone muffin pan on a baking sheet; each well should hold at least 3/4 cup.
- Melt 1 1/2 cups chocolate chips or wafers in 20 to 30-second microwave bursts, stirring between bursts. If needed, add coconut oil 1 teaspoon at a time, up to 1 tablespoon, following package directions for wafers. Reserve half of the melted chocolate for the tops.
- Divide the coating half among the 6 wells, starting with about 1 tablespoon per well. Spread over the bottoms and up the sides to the planned filling height. Chill 5 to 10 minutes until firm, then patch thin spots with the rest of the coating portion and chill until firm.
Crust and Filling
- Mix 1 1/2 cups graham cracker crumbs, 1/2 cup peanut butter, 3 tablespoons melted butter, and 1 pinch salt. Divide evenly among the 6 coated wells and press gently into an even layer. Refrigerate about 10 minutes.
- Divide 7 ounces marshmallow creme evenly among the 6 crusts, spooning or piping it in. Smooth gently and leave room below the chocolate rims for the lids. Chill about 10 minutes.
Chocolate Tops and Decoration
- Divide the reserved half of the melted chocolate over the 6 fillings, letting it cool to barely warm first. Spread to meet the side coating. Rewarm briefly if necessary, then cool again before covering the creme.
- Top the 6 cups with up to 1 tablespoon graham crumbs and 18 mini marshmallows, if using. Refrigerate 30 to 45 minutes until completely firm. Peel the silicone away gently while supporting each cup.
- For toasted toppings, toast the 18 mini marshmallows separately on a heatproof surface with a culinary torch, away from paper liners. Let cool, then add to the cups.
Notes
- Store airtight in the refrigerator for up to 1 week. Let stand 5–10 minutes before serving.
- Freeze individually wrapped cups for up to 2 months; thaw covered in the refrigerator overnight.
- For smaller cups, divide among 9 regular muffin wells, using additional wells if needed.
- Add coconut oil only if needed to thin the chocolate; melting wafers may not need it.
- For toasted toppings, toast mini marshmallows separately on a heatproof surface with a culinary torch. Cool before adding.
