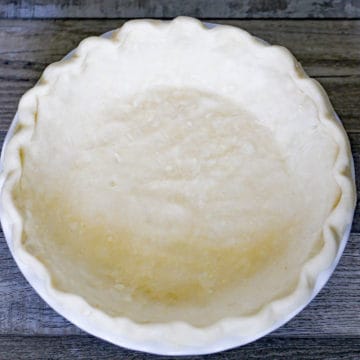
Pie Crust Tips
As an Amazon Associate, I earn from qualifying purchases. Read the full disclosure here.
Creating a delicious and flaky pie crust doesn’t have to be a daunting task with these Easy Pie Crust Tips.
When someone says ‘let’s make a homemade pie crust’ there’s suddenly a pink elephant in the room and it gets real quiet, because no one wants to tackle it. I know! I’ve been there, I get it!
But, it doesn’t have to be that way anymore and if I can do it, anyone can! By following a few key principles, such as keeping your ingredients cold and not overworking the dough, you can create a delicious and flaky crust in no time.
All it takes is a little faith in yourself & a few tricks of the trade and you’ll soon be on your way!
Essential Pie Crust Tips
For the love of God…first rule….Don’t Overmix! 🙂 Using a fork, toss the wet and dry ingredients together or a very few pulses in a food processor. To get a really flaky pie crust, you want the butter to remain in big flakes, so don’t overmix. Who knew, right? We like flaky!
Second rule…Chilling! Chilling is a huge factor when making your crust. That’s why we use ice water and very chilled butter, and if you chill all the utensils, you are using to mix up your dough, that really helps too. No matter how many times you handle or mix the dough, you need to keep it well chilled. It makes the crust tender.
Pie dough also benefits from a rest period after mixing. It makes the dough easier to roll and shape.
Are you ready to tackle some homemade pie dough? Read through these easy tricks of the trade and you’ll soon be on your way to impress!
For One Single-Crust 9- to 10-Inch Pie, You’ll Need:
- 1 ½ cups all purpose flour
- 1 ½ teaspoons cornstarch
- ½ teaspoon salt
- 8 tablespoons unsalted butter cut into ½ inch cubes (for all butter, omit shortening and use 10 tablespoons butter)
- 2 tablespoons Crisco shortening or lard
- 2 teaspoons white vinegar
- Scant ⅓ cup ice cold water
How to Make Homemade Pie Crust
- Whisk together the flour, cornstarch and salt in a small bowl.
- Place butter cubes on plate dusted with flour.
- Measure the cold water and add the vinegar to it.
- Place everything in the fridge for 10-15 minutes to chill up.
Making The Homemade Pie Crust
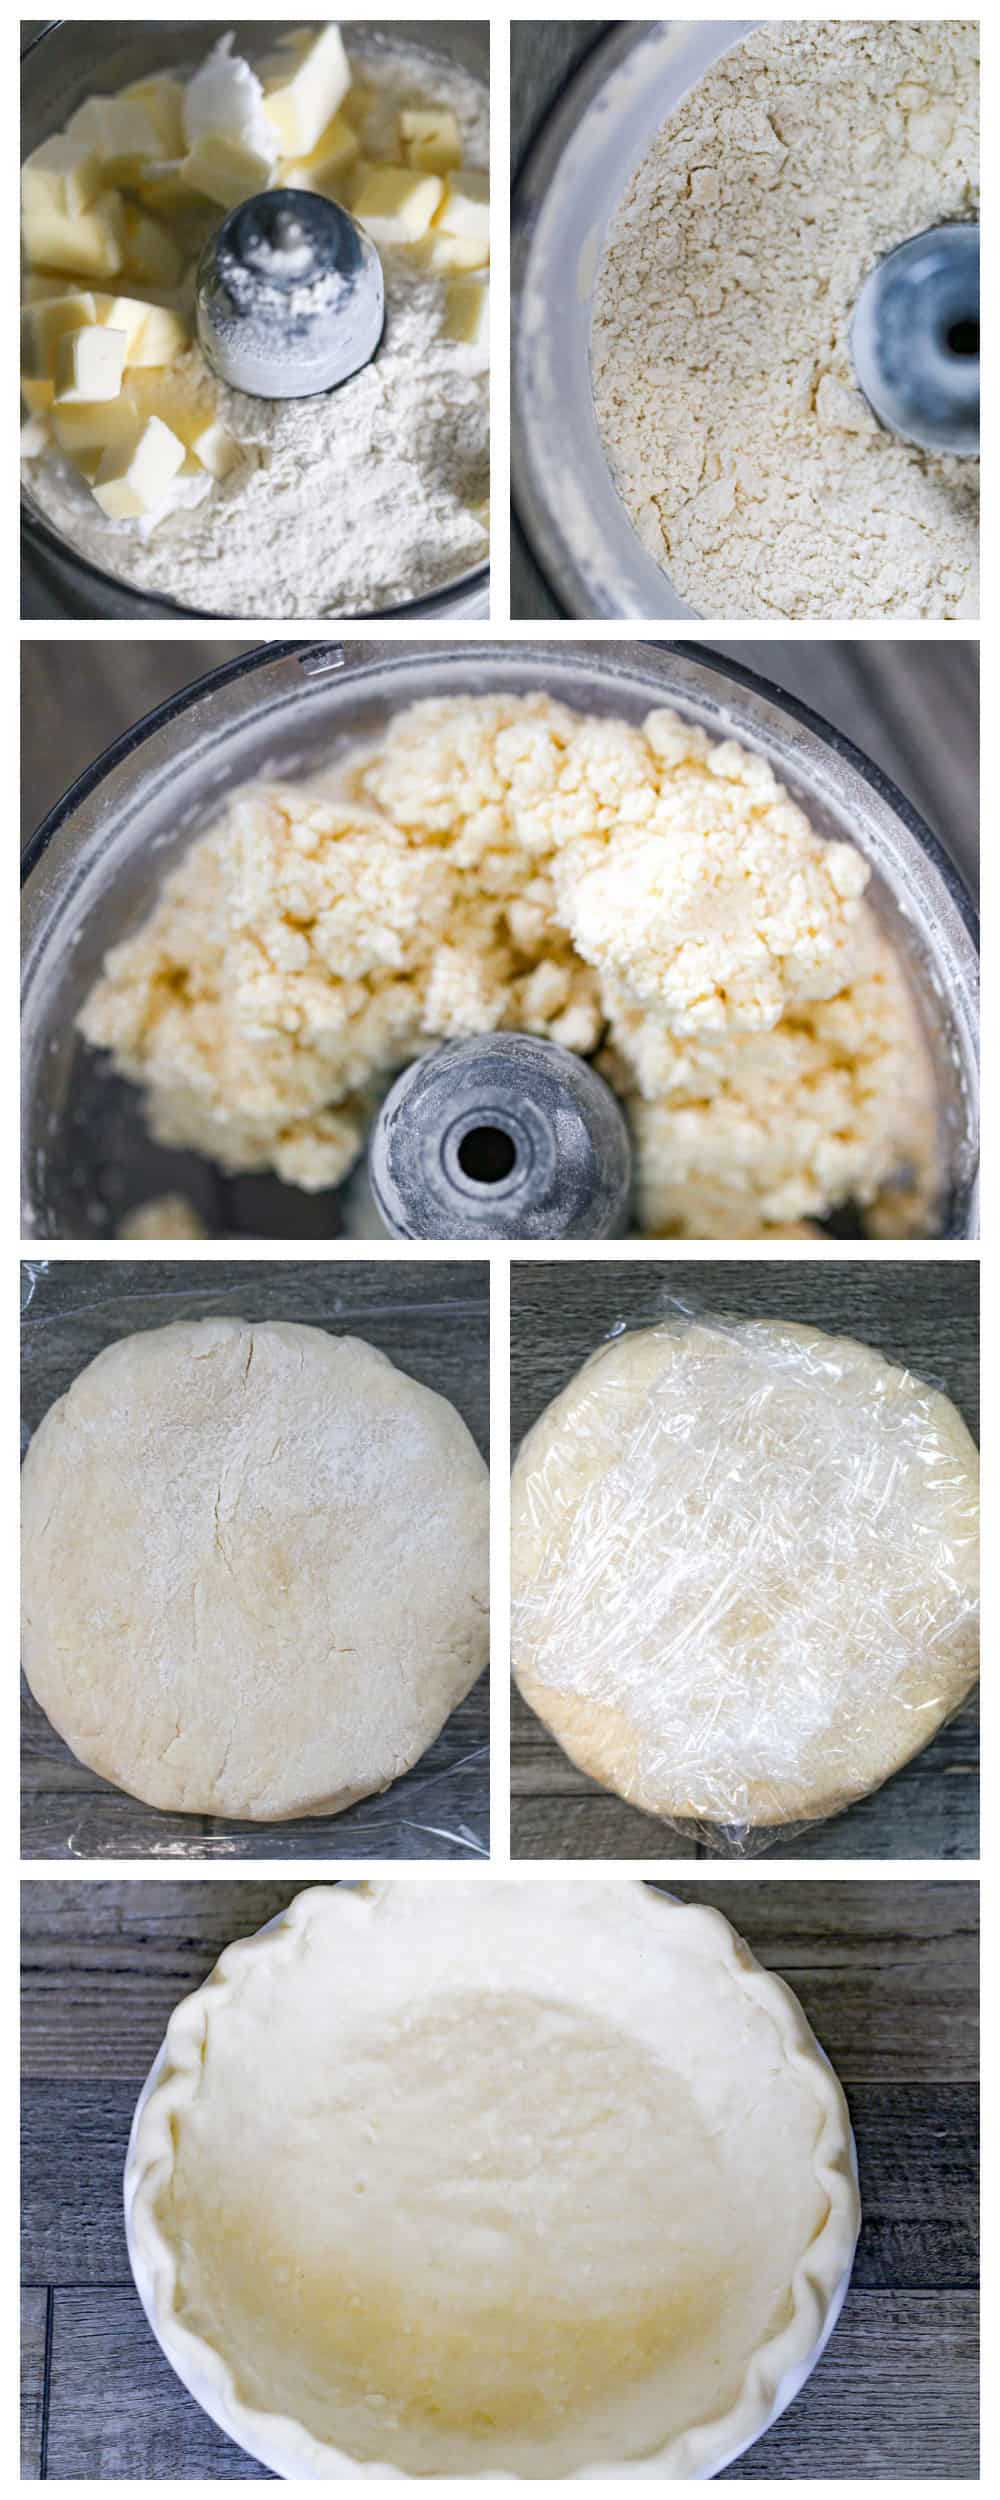
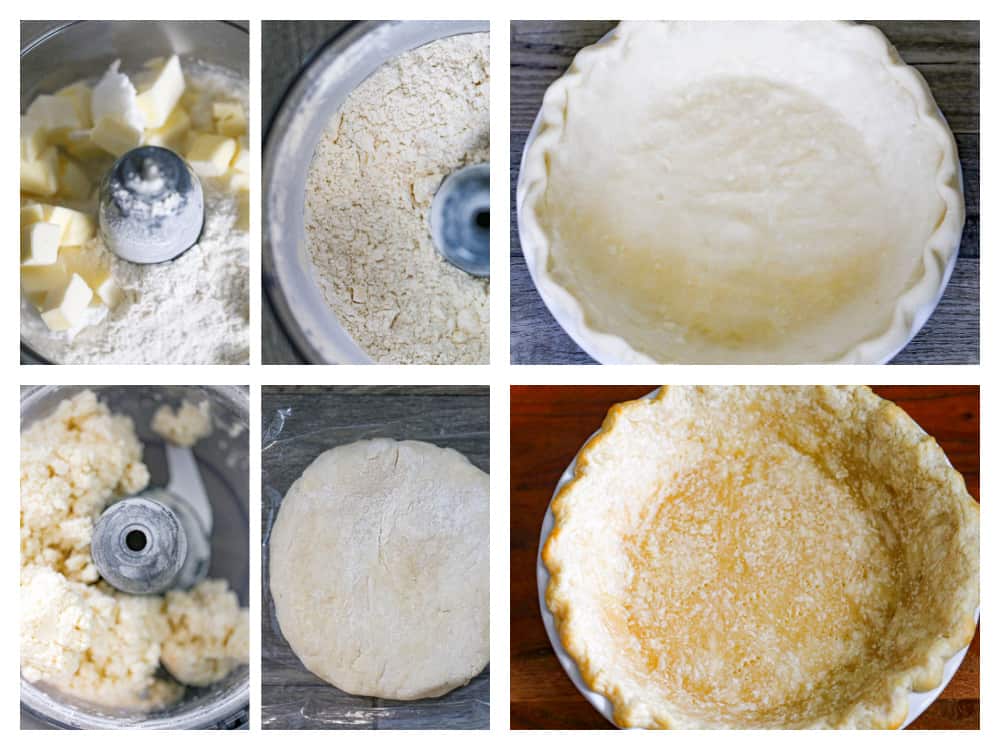
- Transfer the dry ingredients to the food processor. Add the butter/crisco, then pulse the machine 6-7 times, until the pieces of fat are roughly the size of small peas.
- Pour the vinegar-water mixture through the feed tube in a 7-8 second stream, pulsing the machine as you add it. Stop pulsing when the mixtureis just starting to form larger clumps.
- Turn the dough out onto your work surface and pack it into a ball. Put the dough on a sheet of plastic wrap and flatten it into a ¾ inch thick disc. Wrap the disc and refrigerate for at least one hour before rolling.
Flatten & Roll the Pie Dough
- Dust your work surface with flour, before you begin rolling the dough. Dust the top of the dough and the rolling pin as needed, to prevent the dough from sticking.
- Rock over the dough a few times with your rolling pin and begin rolling it from the center out. Give the dough a quarter turn, then repeat the rolling sequence and keep repeating. Roll the dough out into a 12-13 inch circle using medium pressure, not too hard and too little.
- For deep dish make it 12 ½ to 13 inches in diameter. For standard 9 – 9 ½ inch pie pan, a 12 inch circle will do nicely.
- If there’s any lingering flour on the dough, once it’s rolled out, take a pastry brush and brush the excess flour off the dough quickly, as the longer the dough stays at room temperature, the more difficult it is to handle.
Turn the Dough Into the Pie Pan
- Simply run your hands under the dough, then lift into the pan without stretching and tearing. You can also rest the dough at the end of dough and roll the dough onto the pin. Posting the pin over one edge of the pan, then unroll the dough into the pan.
- Make sure the dough is draped evenly over the pan. Gently nudge the dough down the sides of the pan and crease at the bottom. Do this gradually working your way around as you go. You want an overhang of about ½ inch to ¾ inch all around. Trim with scissors to get a nice even cut.
How to Flute The Edge
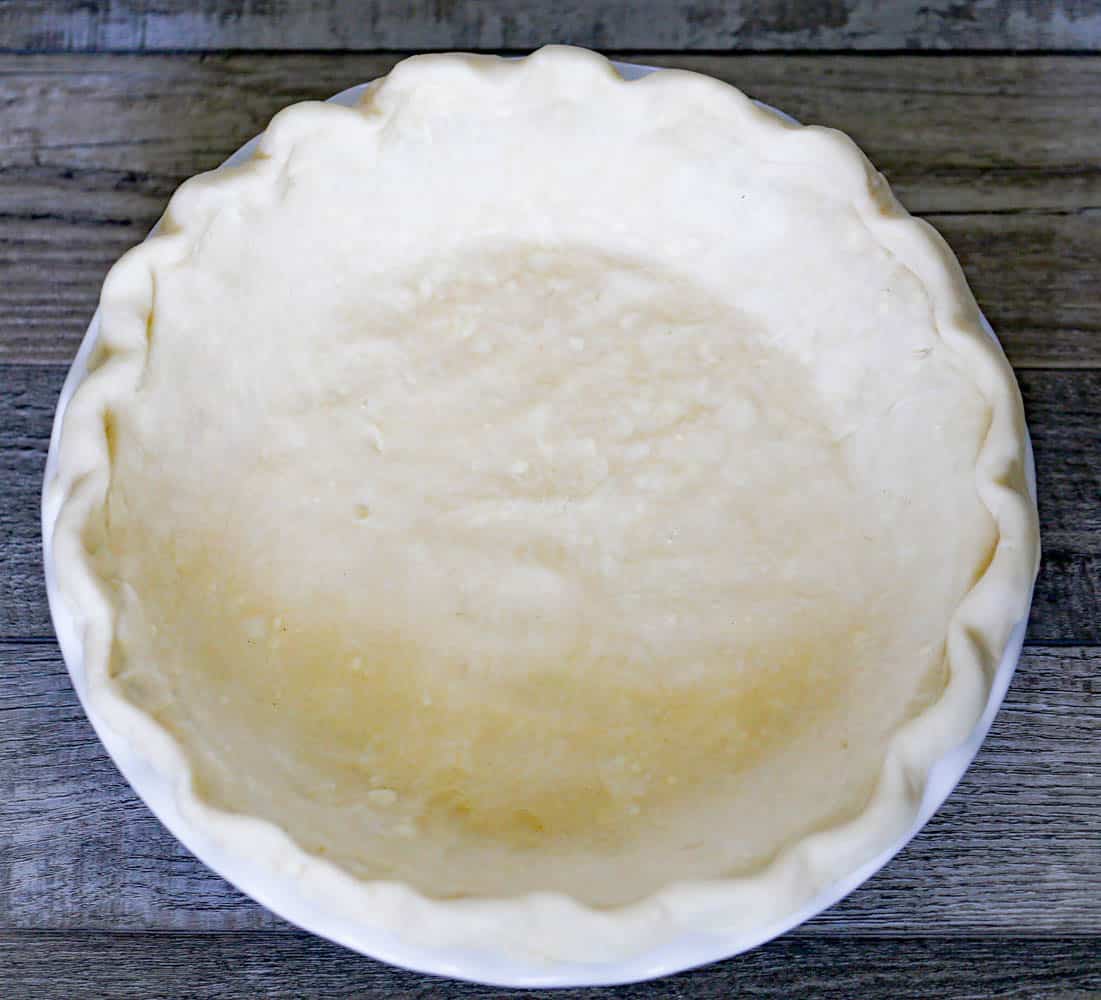
- Starting anywhere along the edge, taking the overhanging dough and fold it under toward the outside of the pan so any seam is hidden. As you fold, pinch the dough together while you sculpt it into an upright ridge ½ to ¾ inches high. Work your way around the edge until you are done.
- Place the shell into the freezer for 5-6 minutes to firm up the ridge. This helps the flutes to hold their shape easier.
- To create the flute, form a V with the thumb and forefinger of one hand against the outside of the rim. With your other forefinger or thumb, press against the shell from the other side, pushing the dough in the V. Continue around the perimeter. Cover with plastic wrap and refrigerate the shell for 15 minutes minimum before filling or blind-baking.
- If you need to prebake the shell, poke the bottom 7-8 times with a fork. When you poke, twist the fork slightly from side to side to enlarge the holes, as small homes tend to close up when prebaking to vent and allow trapped steam to escape when you remove pie weights or dry beans.
Rolling the Dough
When rolling dough out, always start from the center and work your way out in all directions. Use a heavy rolling pin for rolling pie crust. If you roll out the dough on wax paper or parchment paper, it makes cleanup easier. To keep wax paper from slipping, sprinkle a few drops of water on the countertop before arranging the paper.
Once you’ve rolled it out and put it in a pie pan or a cookie sheet, chill it again 30 minutes to overnight. Use a metal or ceramic pie plates when baking pies with butter pie crusts; glass pans are much more slippery.
Storing Easy Pie Crust Tips
Pie dough may be refrigerated for up to 2 days. When ready to use, let the dough sit at room temperature approximately 20 to 30 minutes before rolling. The dough may also be frozen at this point for later use, up to 3 months. When ready to use, thaw the dough overnight in the refrigerator.
Hints for a No-Soggy Crust
Refrigerate the dough for 15 minutes before adding the filling.
You can blind-bake (see below) the crust and then moisture-proof it with one of these tips.
- You can brush it with a bit of egg white two or three minutes after it comes out of the oven.
- A good way to keep pie crust from becoming soggy is to sprinkle it with a mixture of equal parts sugar and flour before adding filling.
- Another way is to brush the unbaked bottom crust of a pie with a well-beaten egg white before filling. This keeps the berries and other fruits from making the pie bottoms mushy.
Baking a frozen pie is also a help, as the crust begins to bake before the heat thaws the filling, and the entire pie bakes for longer than it would normally.
Blind Baking Easy Pie Crust Tips
This refers to the process of baking a pie crust or other pastry without the filling.
Line a pie crust with tin foil, then fill it with beans, rice or pie weights, so that it will keep its shape when baking. Blind-baking is necessary if the pie filling can not be baked as long as the crust requires, or if the filling of the pie would make the crust too soggy if added immediately.
Use a fork to poke holes in the bottom of the crust. This will also keep the bottom from bubbling up.
Another trick to weigh down the dough is to place empty pie pans on top of the dough in the pie plate. This is called double panning.
Blind-baking is essential if the filling is not intended to be baked, for example a chilled filling.
Blind bake @ 200° C or 400° F for 10-15 minutes.
Double Crust Easy Pie Crust Tips
Brush a little water around the edge of the bottom crust before placing the top crust to create a good seal by crimping the top and bottom crust together with your fingers.
Before placing double-crusted pies in the oven, loosely wrap aluminum foil around the pie crust edges to help the edges from browning too quickly. Remove the aluminum about 10 minutes before pies are ready to come out of the oven so the crust is properly browned.
Fruit Pies
Always make deep slits in the top crust of fruit pie. If you do not do this, the filling will be soft and soggy.
For a Golden Brown Top Crust
- 1 tablespoon heavy cream, half & half, or milk
- 1 egg yolk, large
In a small bowl, beat cream and egg yolk together. Using a pastry brush, brush the surface of the top pie crust. Bake.
Cooling Baked Pies
Cool baked pies on a wire rack set on the counter to circulate and prevent it from becoming soggy from the steam remaining it in.
High-Altitude Baking Pie Crust Tips
When making pies at high altitudes, pie crusts are not greatly affected. A slight increase in liquid may help keep them from becoming dry. Use as little flour as possible when rolling out the dough.
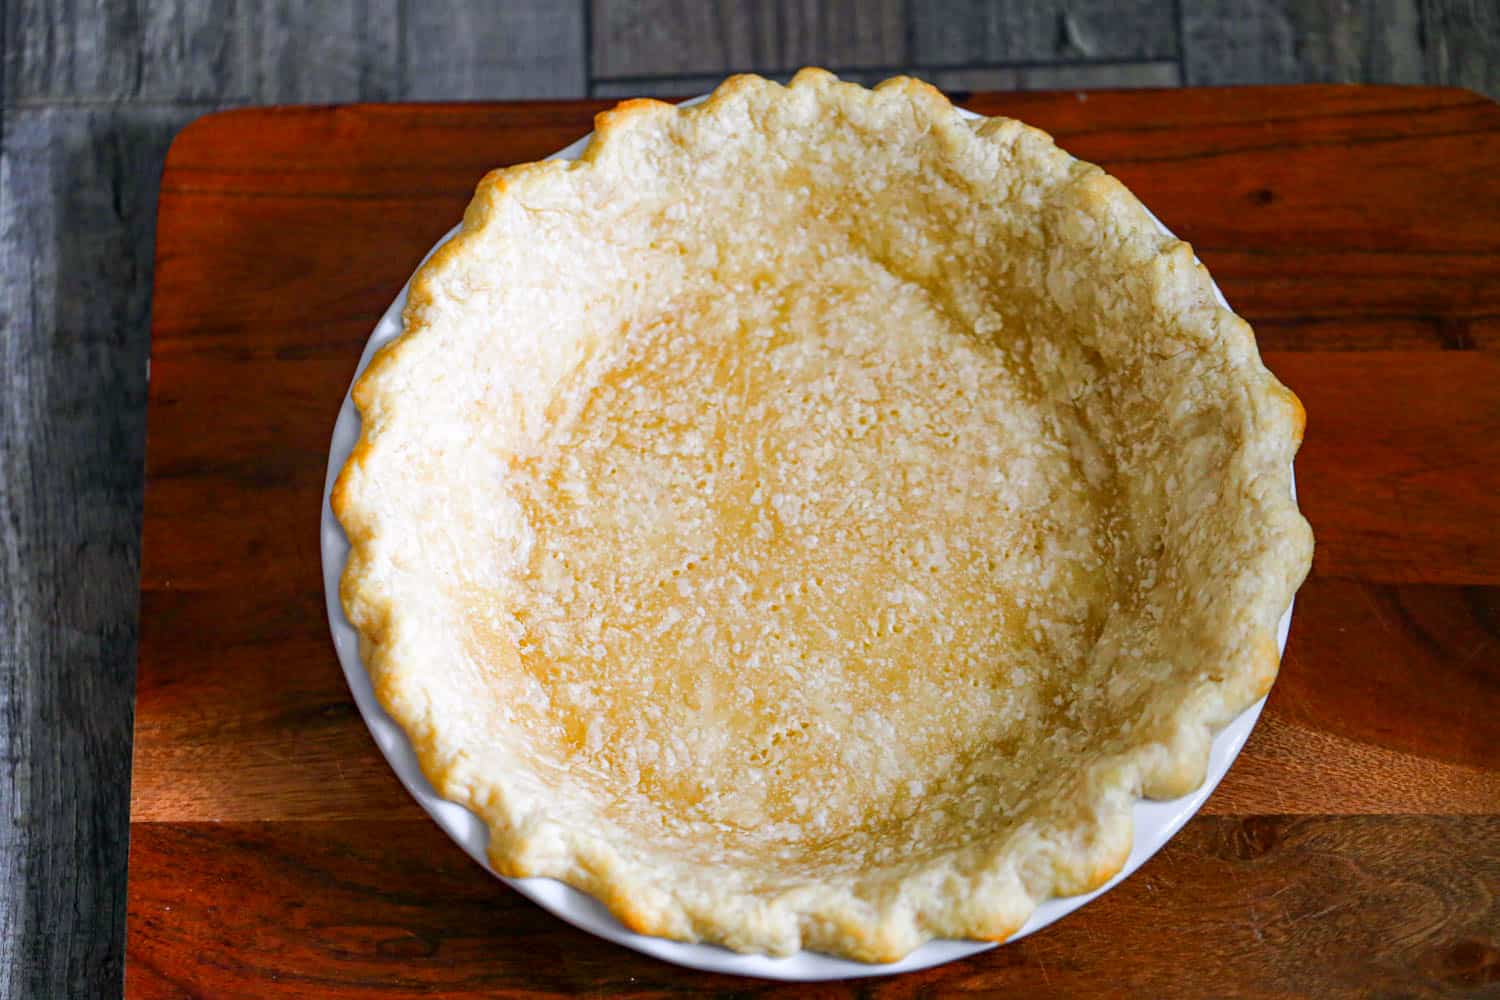
Our easy delicious homemade pie crust has a pretty golden color, tender, flaky layers and buttery flavor throughout and has great flavor on its own.
If you’re one of those people who freak out even thinking about baking pie dough from scratch, our foolproof pie crust recipe uses a food processor to make a pie dough that’s super easy to work with and it bakes up beautifully!
More Tips in the Kitchen!
- Microwave Chocolate Tempering Tips
- How To – Baking Perfect Cookie Tips!
- Conversion Charts & Kitchen Tips
- The Perfect Cheesecake Experience
- Top Baking Tips for Quick Breads
- 16 hacks to make your boxed cake taste better @ MSN (My #9 hack is featured!)
- 5 Expert Tips How to Tell Your Cake Is Done
- Essential Tips for Perfect Muffin Baking!
Easy Homemade Pie Crust
Ingredients
- 1 ½ cups all purpose flour
- 1 ½ teaspoons cornstarch
- ½ teaspoon salt
- 8 tablespoons unsalted butter cut into ½ inch cubes (for all butter, omit shortening and use 10 tablespoons butter)
- 2 tablespoons Crisco shortening or lard
- 2 teaspoons white vinegar
- Scant ⅓ cup ice cold water
Instructions
To Start:
- Whisk together the flour, cornstarch and salt in a small bowl.
- Place butter cubes on plate dusted with flour.
- Measure the cold water and add the vinegar to it.
- Place everything in the fridge for 10-15 minutes to chill up.
Making the crust:
- Transfer the dry ingredients to the food processor. Add the butter/crisco, then pulse the machine 6-7 times, until the pieces of fat are roughly the size of small peas.
- Pour the vinegar-water mixture through the feed tube in a 7-8 second stream, pulsing the machine as you add it. Stop pulsing when the mixtureis just starting to form larger clumps.
- Turn the dough out onto your work surface and pack it into a ball. Put the dough on a sheet of plastic wrap and flatten it into a ¾ inch thick disc. Wrap the disc and refrigerate for at least one hour before rolling.
Flatten & Roll the Dough
- Dust your work surface with flour, before you begin rolling the dough. Dust the top of the dough and the rolling pin as needed, to prevent the dough from sticking.
- Rock over the dough a few times with your rolling pin and begin rolling it from the center out. Give the dough a quarter turn, then repeat the rolling sequence and keep repeating. Roll the dough out into a 12-13 inch circle using medium pressure, not too hard and too little.
- For deep dish make it 12 ½ to 13 inches in diameter. For standard 9 - 9 ½ inch pie pan, a 12 inch circle will do nicely.
- If there’s any lingering flour on the dough, once it’s rolled out, take a pastry brush and brush the excess flour off the dough quickly, as the longer the dough stays at room temperature, the more difficult it is to handle.
Turn the Dough into the Pie Pan
- Simply run your hands under the dough, then lift into the pan without stretching and tearing. You can also rest the dough at the end of dough and roll the dough onto the pin. Posting the pin over one edge of the pan, then unroll the dough into the pan.
- Make sure the dough is draped evenly over the pan. Gently nudge the dough down the sides of the pan and crease at the bottom. Do this gradually working your way around as you go. You want an overhang of about ½ inch to ¾ inch all around. Trim with scissors to get a nice even cut.
To Flute the Edge
- Starting anywhere along the edge, taking the overhanging dough and fold it under toward the outside of the pan so any seam is hidden. As you fold, pinch the dough together while you sculpt it into an upright ridge ½ to ¾ inches high. Work your way around the edge until you are done.
- Place the shell into the freezer for 5-6 minutes to firm up the ridge. This helps the flutes to hold their shape easier.
- To create the flute, form a V with the thumb and forefinger of one hand against the outside of the rim. With your other forefinger or thumb, press against the shell from the other side, pushing the dough in the V. Continue around the perimeter. Cover with plastic wrap and refrigerate the shell for 15 minutes minimum before filling or blind-baking.
- If you need to prebake the shell, poke the bottom 7-8 times with a fork. When you poke, twist the fork slightly from side to side to enlarge the holes, as small homes tend to close up when prebaking to vent and allow trapped steam to escape when you remove pie weights or dry beans.
Blind Baking
- Blind baking refers to the process of prebaking the pie shell either partially or fully to set the crust to keep it crusty. Pies that benefit the most for partially prebaking include pumpkin, custard, pecan, chess and sweet potato, just to name a few. Certain pie shells need to be fully prebaked when no further baking is needed for pies, most notably cream pies, where the filling is cooked separately, then added to the shell.
To Weigh Down the Crust
- The first step is to weigh down the crust so it doesn’t balloon up in the oven. If it puffs up, it may not brown properly and it becomes misshapened, so it may not hold the filling.
- Line the shell with foil, very large coffee filters or parchment paper by nudging it evenly into the pan without disrupting the pie shell. Leave the overhang of the foil or parchment paper on opposite sides and fold it down like wings that you can grab and then place the pie pan onto a baking sheet lined with parchment paper. Add enough dried beans or pie weights about 2/3rds full, and level them out evenly, especially up and around the sides.
Baking the Pie Crust
- Before baking, adjust the racks in the oven. One rack should be in the bottom position and another in the middle. Preheat the oven to 375 degrees and make sure you place your pie shell on a baking sheet lined with parchment paper to soak up any leaking butter once it starts baking and to avoid any messes.
- For Partially Prebaked Pie Shells (pumpkin, custard, pecan, chess and sweet potato) bake for a full 25 minutes without opening the oven door. Once 25 minutes is up, carefully remove the foil, very large coffee filters or parchment paper by gently lifting it out of the pan so it comes out without grabbing the shell. Re-poke the holes if they closed up. The holes will keep the pie from puffing up during the next stage.
- Continue baking but move to the center rack and lower the heat to 350 degrees. Set the timer for 10 minutes without opening the oven door. Pie should have dry-ish surface and the top edge should be starting to turn golden brown. If not, bake for 3-4 minutes longer.
- For Fully Prebaked Pie Shells (cream pies) bake an additional 15-18 minutes after the initial bake, instead of 10 minutes until golden brown and crusty. Cool the pie shell on a cooling rack and cool thoroughly before filling.
Notes
- Pro Tip for Sealing Fully Prebaked Shells: Remember those holes you poked with a fork around your pie crust? I found you can seal the crust from the moisture of fillings by smearing the smallest amount of cream cheese into the holes, like putty to a tiny nail hole. You can also use egg white, by brushing the entire surface with a lightly beaten egg white immediately when the pie comes out of the oven.
- For double crust or lattice pies, double this recipe. Divide the dough in half, making one of the halves a little bigger for the bottom crust, since it's a bigger portion to cover.
- Pie dough can be refrigerated for up to 3 days, as long as it’s well wrapped in plastic. Unbaked pie shells can also be refrigerated for up to 3 days.

