Microwave Chocolate Tempering: Quick, Easy & Perfect for Dipping
Tempering chocolate doesn’t have to feel fancy or fussy — especially when you use microwave chocolate tempering. This quick, cozy method gives you smooth, glossy, beautifully snappy chocolate without the drama of stovetop thermometers. If you’ve ever wondered how to temper chocolate in the microwave and actually get professional‑looking results, you’re in the right place.
Before we melt anything, let’s start with the most important step: prepping your chocolate so it melts evenly and becomes the perfect base for tempering chocolate for dipping, drizzling, and all your sweet creations.
How to Prep Your Chocolate for Microwave Tempering
To prep chocolate for microwave tempering, you want to:
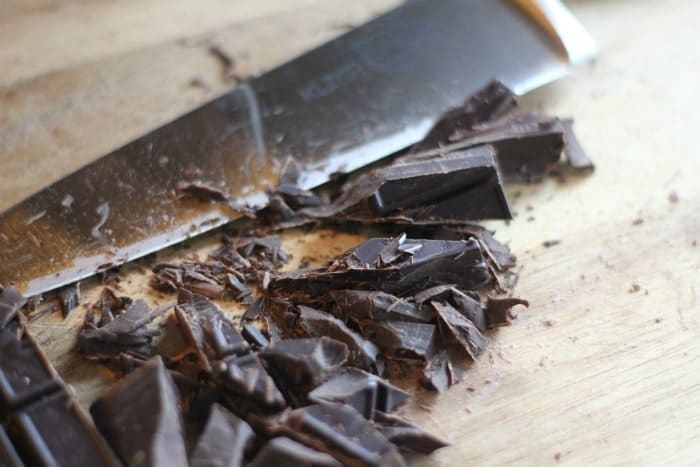
- Chop your chocolate into small, even pieces. This helps it melt evenly and prevents hot spots that can push it out of temper.
- Use good‑quality chocolate. Bars, callets, or couverture melt the smoothest. Chocolate chips work, but they melt slower because of stabilizers.
- Make sure everything is completely dry. Even one drop of water can make chocolate seize.
- Place the chocolate in a microwave‑safe bowl. Plastic or silicone bowls are best because they don’t hold onto heat the way glass does.
- Set your microwave to 50% power. Low and slow is the secret to keeping chocolate in temper.
Getting Your Chocolate Ready to Melt
Chips vs. Chopped Chocolate
Before you start heating anything, move your chocolate into a microwave‑safe bowl. You can use chopped chocolate or chocolate chips — both work — but they behave a little differently. Chopped chocolate melts faster and more evenly, while chips melt more slowly because they contain stabilizers. Either way, they’ll work beautifully for quick chocolate tempering as long as you stir often and heat gently.
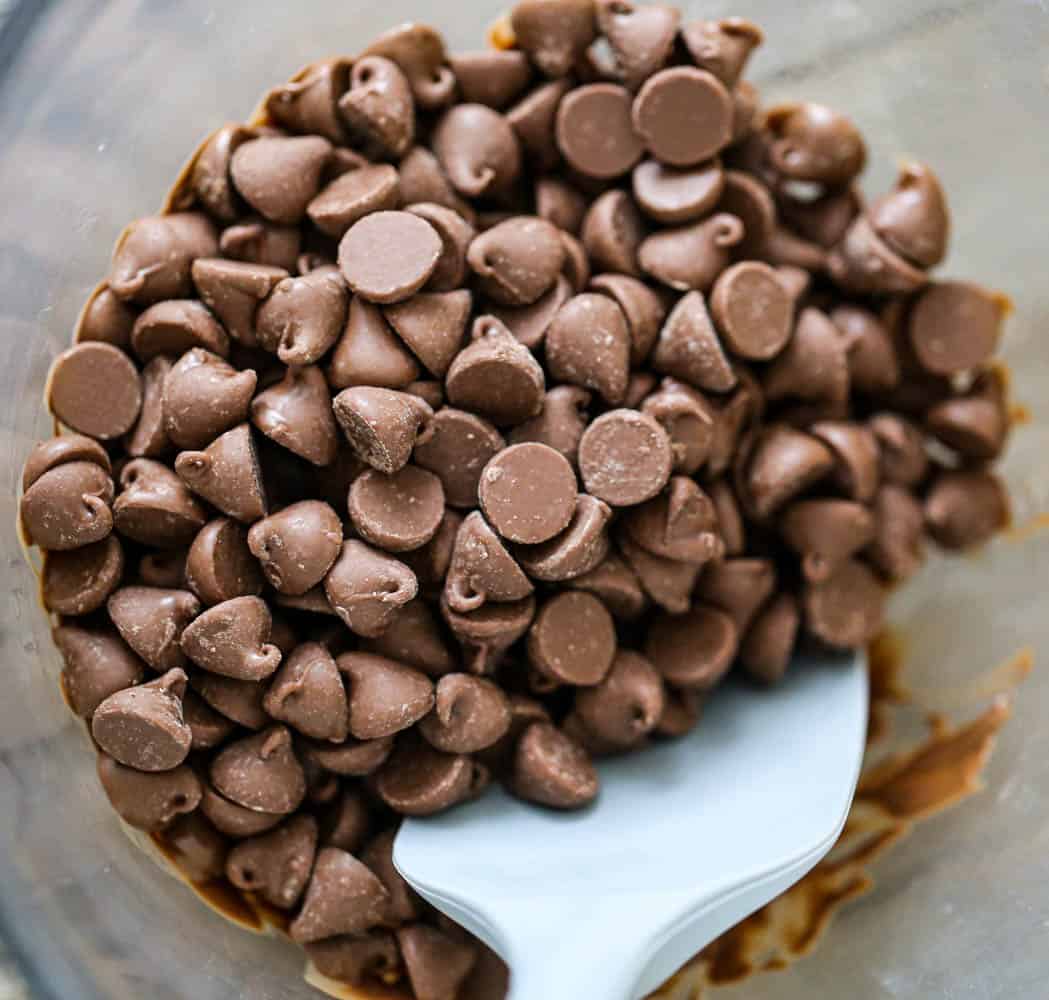
Use a plastic or silicone bowl instead of glass, which holds onto heat and can push chocolate out of temper. Set your microwave to 50% power — low and slow is the secret to smooth, controlled melting when you’re learning how to temper chocolate in the microwave without overheating it.
How to Temper Chocolate in the Microwave (Step‑by‑Step)
Heat in Short Bursts
To start the tempering process, microwave your chocolate in short bursts — 20 to 30 seconds at a time — and stir well after each round. Chocolate often looks solid even when it’s melting underneath, so stirring is what keeps the heat evenly distributed and prevents scorching.
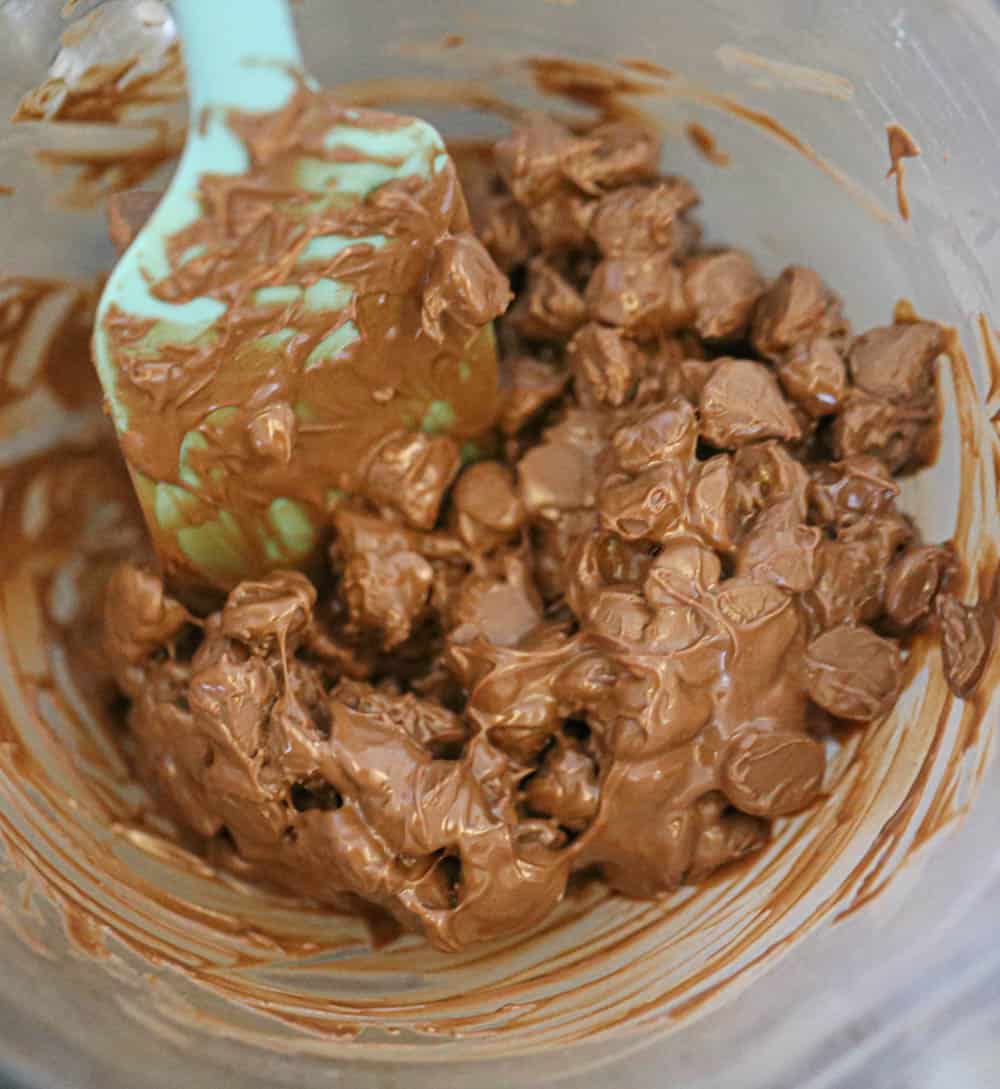
Stop heating when the chocolate is about 75% melted. At this stage, you should still see some small unmelted pieces. This is exactly what you want — the remaining chocolate will melt from the bowl’s residual heat, which helps keep the chocolate in temper and prevents overheating.
Stirring, Seeding & Creating That Perfect Gloss
The Seeding Method
Once your chocolate is mostly melted, it’s time to “seed” it — which is just a fancy way of adding a little unmelted chocolate back into the bowl. This step introduces stable cocoa butter crystals that help your chocolate set shiny, smooth, and beautifully snappy. It’s the easiest way to keep your microwave chocolate tempering on track without needing a thermometer.
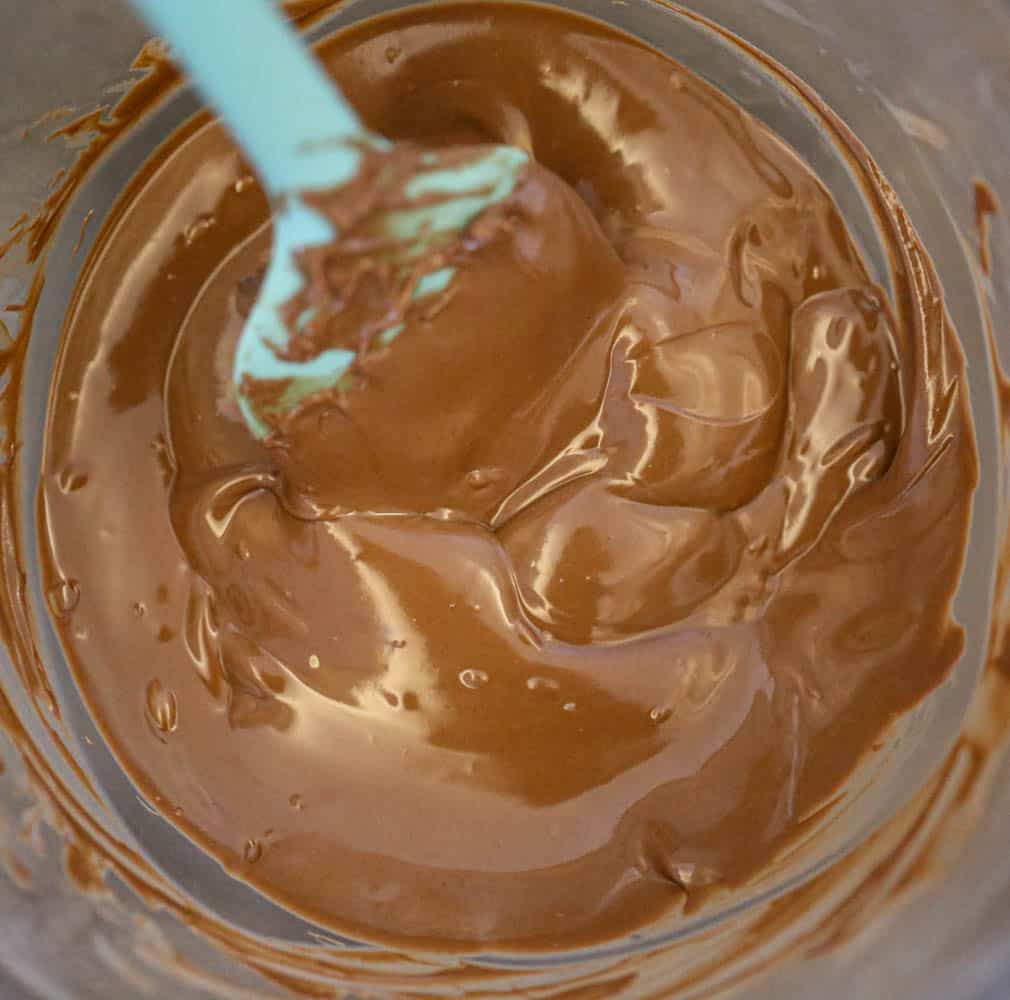
Stir the chocolate slowly and continuously until every last piece melts and the mixture looks silky and glossy. When the chocolate flows like warm ganache and clings lightly to your spatula, it’s perfectly tempered and ready for dipping, drizzling, or coating. If it starts to thicken as you work, warm it in 5‑second bursts at 50% power — just enough to keep it fluid without losing temper.
Chocolate Temperatures for Dark, Milk & White Chocolate
Why Temperature Matters
Even with the microwave method, chocolate still has a “sweet spot” where it sets shiny, smooth, and perfectly snappy. Each type of chocolate has its own ideal temperature range because of the different amounts of cocoa butter, milk solids, and sugar. Keeping your chocolate within these ranges helps maintain temper and prevents streaks, bloom, or a dull finish.

Here’s a quick, cozy cheat sheet to keep your chocolate in the right zone:
- Dark chocolate: 88–90°F
- Milk chocolate: 86–88°F
- White chocolate: 82–84°F
If you don’t have a thermometer, don’t stress — the microwave method is forgiving as long as you heat slowly, stir often, and stop before the chocolate gets too hot. Properly tempered chocolate will look glossy, flow smoothly, and set quickly at room temperature.
Quick Chocolate Tempering Tips for Best Results
Keep the Heat Low & Slow
Microwave chocolate at 50% power to avoid overheating. Chocolate burns fast, and once it overheats, it loses its shine and smooth texture.
Stir More Than You Think
Stirring distributes heat evenly and helps the chocolate melt without scorching. Even if it looks unmelted, stir anyway — chocolate melts from the inside out.
Stop Heating at 75% Melted
This is the secret to microwave chocolate tempering. Let the residual heat melt the rest. It keeps the chocolate in temper and prevents overheating.
Add a Little Extra Chocolate (Seeding)
If your chocolate looks too warm or thin, add a small handful of unmelted chocolate and stir until smooth. This reintroduces stable cocoa butter crystals.
Avoid Water at All Costs
Even a tiny drop of water can make chocolate seize into a thick, grainy paste. Keep bowls, spatulas, and hands completely dry.
Keep Chocolate Warm While You Work
Tempered chocolate cools as you dip. If it thickens, warm it in 5‑second bursts at 50% power — just enough to loosen it without losing temper.
Best Chocolate for Tempering in the Microwave
What Melts the Smoothest
For the easiest, glossiest results, choose chocolate that has a higher cocoa butter content and fewer stabilizers. Couverture chocolate, baking bars, and high‑quality callets melt beautifully and stay silky during tempering. They’re designed to melt evenly, flow smoothly, and set with that perfect snap.
What to Avoid
Chocolate chips, candy melts, and lower‑quality chocolate can still work, but they’re formulated to hold their shape in the oven. That means they melt slower and sometimes thicken faster. If you use them, just stir more often and heat gently — the microwave method is forgiving as long as you go slow.
A Quick Buying Tip
Look for chocolate labeled “couverture,” “melting wafers,” or “baking bars.” These melt the most consistently and give you the best shine and texture for dipping, drizzling, and coating.
Tempering Chocolate for Dipping, Drizzling & Decorating
Once your chocolate is smooth, glossy, and flowing like warm ganache, it’s ready for all the fun stuff — dipping strawberries, coating pretzels, drizzling over cookies, or decorating candies. Tempered chocolate sets quickly at room temperature, so you can work confidently without worrying about sticky or streaky results.
Dipping Tips (Smooth, Even Coating)
- Use room‑temperature ingredients — cold items make chocolate seize or crack.
- Tap off excess chocolate to avoid thick, clumpy coats.
- Let dipped treats set on parchment for easy release and clean bottoms.
- If the chocolate thickens, warm it in 5‑second bursts at 50% power.
Drizzling Tips (Pretty Lines & Swirls)
- Use a spoon, piping bag, or zip‑top bag with a tiny corner snipped.
- Hold your hand a few inches above the treat for smooth, even lines.
- For zigzags, move your hand quickly; for thicker lines, slow down.
- Add sprinkles immediately — tempered chocolate sets fast.
Decorating Tips (Clean Edges & Shiny Finish)
- Use a small offset spatula for spreading chocolate on bars or bark.
- For curls or shavings, let chocolate partially set, then scrape.
- To attach decorations (nuts, candies, sprinkles), press them on while the chocolate is still tacky.
- Keep your workspace warm — cool air thickens chocolate quickly.
Keeping Chocolate in Temper While You Work
Tempered chocolate naturally cools as you dip and decorate. To keep it fluid:
- Warm in 5‑second bursts at 50% power,
- Or set the bowl on a heating pad on low
- Or place the bowl over a warm (not hot) water bath
The key is to warm it just enough to stay fluid without pushing it out of temper.
Troubleshooting Microwave Chocolate Tempering
| Problem | Why It Happens | Quick Fix |
|---|---|---|
| Chocolate is thick or grainy | Overheated | Add chopped chocolate and stir until smooth |
| Chocolate seized into a paste | Water got in | Add hot water 1 tsp at a time (usable but not tempered) or start over |
| Chocolate won’t melt smoothly | Chips/stabilizers | Chop smaller, heat in shorter bursts, stir more |
| Chocolate lost shine / white streaks | Out of temper | Re-temper gently and seed with extra chocolate |
| Chocolate thickens while dipping | Cooled down | Warm in 5-second bursts at 50% power |
| Chocolate won’t stick to items | Too cold or wet | Use room-temperature, completely dry ingredients |
| Chocolate sets too slowly | Warm or humid kitchen | Move to cooler room or chill 5–10 minutes |
FAQ – Microwave Chocolate Tempering
Q: Can I temper chocolate in the microwave without a thermometer A: Yes. Heat slowly at 50% power, stir often, and stop when it’s about 75% melted. Seed with extra chocolate to keep it in temper.
Q: Why did my chocolate turn thick or grainy A: It overheated. Add a little chopped chocolate and stir until smooth.
Q: Can I fix chocolate that seized A: You can make it smooth again with hot water, but it won’t be tempered. For dipping or coating, start over with dry tools.
Q: Do chocolate chips work for tempering A: Yes, but they melt slower because of stabilizers. Chop them smaller and heat in shorter bursts.
Q: How do I keep chocolate warm while dipping A: Warm it in 5‑second bursts at 50% power or set the bowl on a heating pad on low.
Q: Why does my chocolate lose its shine A: It slipped out of temper. Re‑temper gently and seed with extra chocolate.
You’re Ready to Temper Chocolate Like a Pro
With a little patience, low heat, and plenty of stirring, microwave chocolate tempering becomes second nature. Keep this guide handy, trust the process, and enjoy that glossy, snappy chocolate every single time.
More Chocolate Tips & Recipes You’ll Love
Now that you’ve mastered the art of melting chocolate, you’re ready to dive into even more delicious chocolate goodness. Whether you’re baking, dipping, drizzling, or decorating, these chocolate guides and recipes will help you level up every treat.
Chocolate is one of the most magical ingredients in the kitchen — and now you know how to melt it like a pro. Keep exploring, keep experimenting, and most of all… keep enjoying every delicious moment. Share these microwave method tempering chocolate tips on Pinterest, Facebook & Instagram!
More Tips and Tricks
Tempering Chocolate (Super Short Method)
Ingredients
- 8 oz good quality chocolate bar chopped, chocolate chips can be used, but the chocolate bar gives you the best shine and snap
Instructions
- Chop chocolate into small, even pieces (chop large chocolate chips too so they melt evenly).
- Microwave 2/3 of the chocolate in 20–30 second bursts, stirring each time.
- Stop when it’s mostly melted with a few soft lumps.
- Stir in the remaining 1/3 chocolate until fully melted and smooth.
- Keep stirring until it thickens slightly and feels cooler.
- Use immediately.
Notes
